Showing posts with label crochet. Show all posts

Saturday, November 9, 2013

Cord Edged Coasters: Free Crochet Pattern!

It seems to me that half the people I know are really tired right now, and I am right there, yawning along with them.

On Thursday, in my half asleep haze, I watched a couple of old movies (Babe, Pollyanna) while my fingers hooked up an incredible EIGHT coasters.


I then used Snapchat to turn them into pictures to send to my friends: 


I thought I would share the incredibly simple pattern with you.

I used a ball of 8ply (DK) that I scored from a secondhand shop years ago for $2, and then dyed. Out of the 99.7m (109yards) I just managed to eke out eight coasters.

Here are five: 

Cord Edged Coasters

This pattern uses US terms!
UK/AUS terms are in italics, eg: (triple crochet!

Yarn: I used DK weight yarn

Hook: I used a 4mm (G) hook


Start: Make a loop to crochet into, you could do a magic loop if you want to. Because I wanted to get the most out of my yarn, I made a slip stitch (leaving a very short tail), chained 4, then slip stitched into the first stitch to close it.

Round 1: chain 2, make twelve double crochets (triple crochet) into the ring, slip stitch into top of first double crochet (triple crochetto join.

Round 2: chain 2, make two double crochets (triple crochet) in the same stitch, and in each stitch thereafter. Slip stitch into the top of the first double crochet (triple crochet) to join. (24 stitches in total)

Round 3: chain 2, make one double crochet (triple crochet) in the same stitch, and two double crochets (triple crochet) in the next stitch. Repeat this pattern of one double crochet (triple crochetand then two double crochets (triple crochet) (1, 2) all the way around. Slip stitch into the top of the first double crochet (triple crochet) to join.  (36 stitches in total)

In the next round, instead of doing double crochet (triple crochet), we make single crochet (double crochet). 

Round 4: Chain 2, make one single crochet (double crochet) in the same stitch, a single crochet (double crochet) into the next stitch, and two single crochets (double crochet) in the stitch after that. Repeat this pattern (1, 1, 2) all the way around. Slip stitch into the top of the first single crochet  (double crochet) to join.  (48 stitches in total)

Now, the bit that feels really weird! We are going to do reverse single crochet (also called crab stitch) to make the edging. This just backwards crochet. I am left handed, so usually I crochet in a clockwise direction. For reverse single crochet, however, I crochet in an anti-clockwise direction. 

There are lots of video tutorials already on the web. I have embedded one at the end of this post.

Edging: chain 1, skip the closest stitch, and reverse single crochet all the way around for that lovely cord-like edging. Finish it off by cutting a tail of about 10cm (4inches), threading it only a needle, and making a couple of stitches that mimic the previous crab stitch. Weave in ends.

Now make yourself a drink and use the coaster!

This pattern is for personal use only. The pattern may not be distributed or sold. Items made from this pattern, however, are yours to do what you wish with, including selling.


http://www.mooglyblog.com/reverse-single-crochet-crab-stitch/

Tuesday, March 20, 2012

Abalone and Flowers (a crafty update)

At last, I have been able to upload photos! YAY! I really need to find the software for my camera so I can use the desktop for photo-related-stuff. 


I've just realised how long it's been since I've done a knitting/crochet update post.


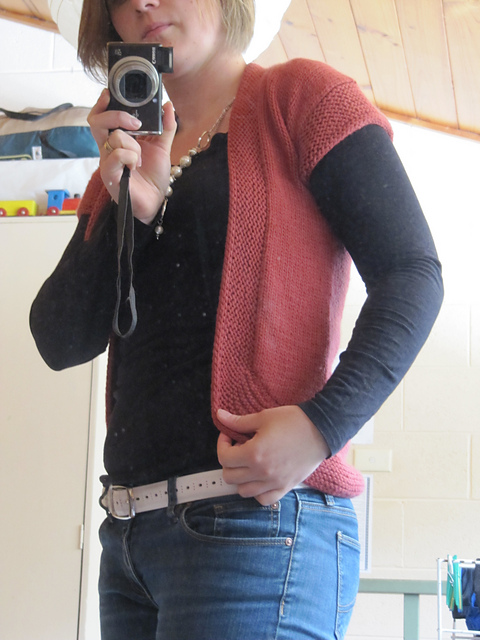
So, the latest thing off the needles is this beauty (excuse my dirty mirror), Abalone.
I have worn it out, and was even complimented, which is always nice. It's like wearing a big cuddle. I love how soft it is.


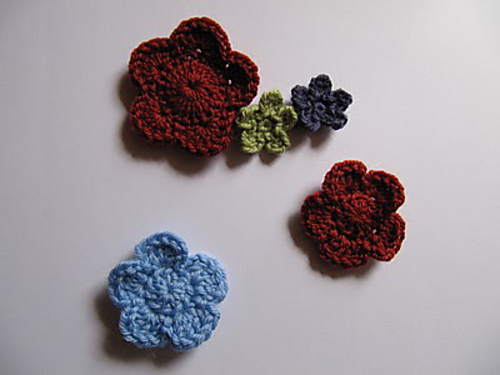
These flowers were a little 30min project: a blind-pull for my parent's new house. The flowers were made using my Spring Blossoms pattern.


And those are the projects this post's title was referring to.


Below are some more of my recent projects, for your viewing pleasure (and my showing pleasure) - which do you like most? 


Slippers for my mother-in-law, a birthday present, made using my own pattern.


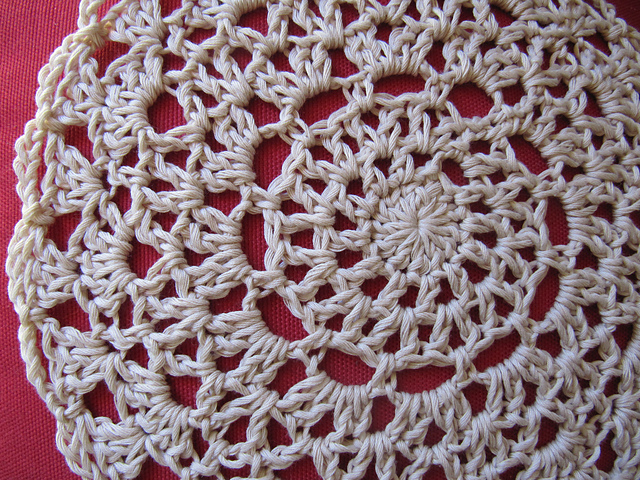
A doily, made up as I went along, now living under my fruit bowl.


An angel (you can just see the gold wings).


A strawberry keyring, a present for a friend.


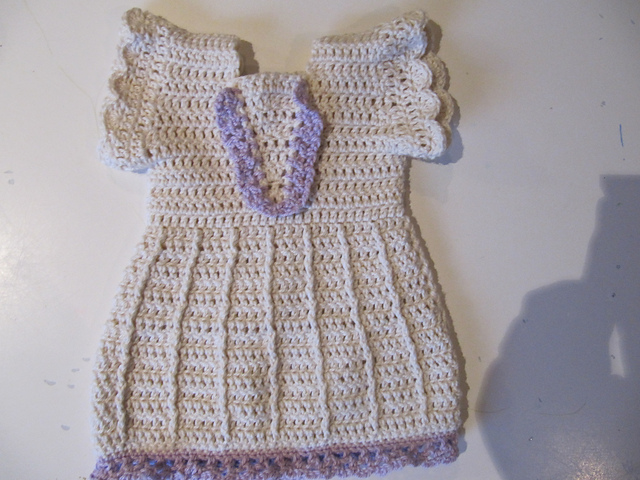
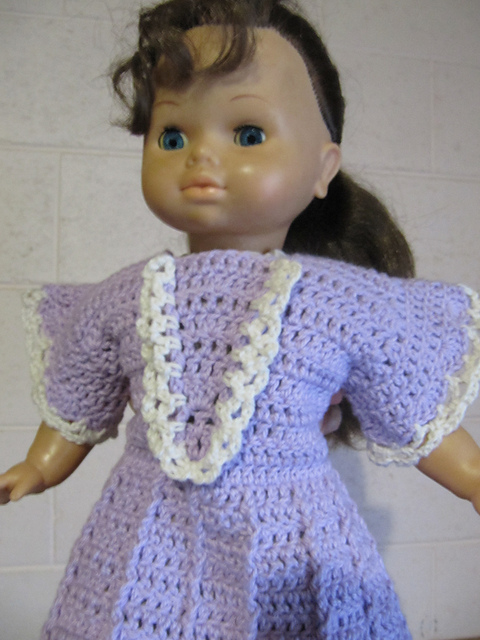
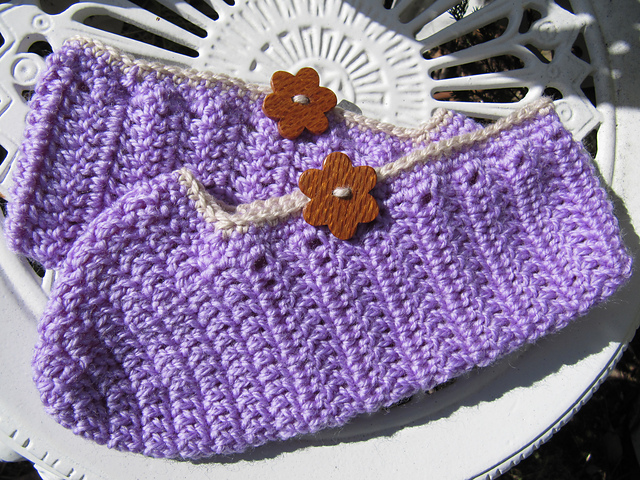
And lastly, two dolls dresses, one in lilac and one in cream.
(This picture was taken in a hurry!)


There's something so inspiring about looking at what you have made. I've been working on a few other projects for a while now, hopefully it won't be too long before I can share more finished things with you (such as an incredible stripy scarf!).

Wednesday, March 14, 2012

It's been a while...

Hello!


I thought I should finally post something, seeing as it's been well over a month since my last post. (I don't think I'll ever quite succeed at this blogging game.)


Some catch-up:
- This year is going way too fast!
- I'm behind on my 'finish crochet/knit 52 projects in 2012' challenge
- I'm on track with my 'read 50 books in 2012' challenge (are you on Goodreads? Friend me!)


And most importantly of all, I'VE HAD WORK! Seven days to be precise! Relief teaching is at once more fun and infinitely more challenging than I ever could have imagined. I've already semi-lost my voice (happily now recovered). I haven't got any more days lined up the moment, so I'm enjoying my time off while I have it.


Also, the new Sherlock Holmes series is quite good - I am very pleased! And I've started reading Charles Dicken's Great Expectations (because I saw the first episode of it on iview the other night) and I like the book but the writing is so old fashioned I sort of feel like I'm reading by "squinting". Do you ever read like that? Where you sort of just read and let the writing wash over you so you get the general impression, and not letting yourself get caught up in the old-fashioned language and writing. It makes it a whole lot easier. I have just reached "The End Of The First Stage Of Pip's Expectations".


Lastly, I still need to either commandeer Julian's laptop or install the camera software on the desktop... until then photos are stuck on my camera. When I finally do either of those two things, I'll finally be able to do a crochet/knitting update post.


Until then!

Saturday, November 26, 2011

Pears and Roses

Hello! 

As you can see from all the posts, the 21 day organising challenge is going great! Okay... so maybe not. Somethings are more exciting than organising (though don't get me wrong - I love to organise stuff!).
Instead of organising I've been busy crocheting like the wind!

A while back I decided it would be awesome if I managed to reach 150 finished objects (FOs) on Ravelry by then end of 2011. In the last week alone I've finished a total of seven projects, which means I've only got 15 to go!

Totally reachable!

Here are some of the things I've been making. Each of these projects were for a Kris Kringle gift.

A tiny pear keyring.


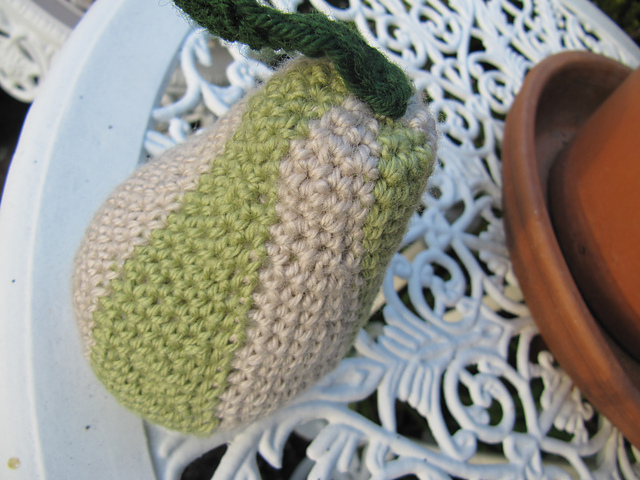
A pear pincushion. This was the first time I've used two colours simultaneously while crocheting. I love the result! Inside are a couple of metal scourers. Apparently they help keep pins sharp.


This is what it looks like on the inside:


A rose brooch - I was very gratified when the recipient pinned it on immediately!


Now I just want to make dozens of tiny pears and rose brooches!

Friday, November 11, 2011

Remembering and Rainbows

Originally, this post was just going to be about a rainbow badge I made for my niece, whose birthday is today (she's currently into rainbows), but I also want to say something to acknowledge all the courageous men and women who have fought to keep Australia free. 

Thinking about these two things, the rainbow and Rememberence Day, I realised that there is a connection - for me at least. For me, the rainbow is all about remembering. When I see a rainbow, it reminds me of God. I'm filled with joy and thankfulness that my God is faithful and trustworthy. I can honestly say that God has never disappointed me. He has made even the hard and difficult parts of my life into something beautiful.

This post is getting much deeper than I intended!

Here is the rainbow badge I made for my neice:


To make it, this is what I did:
  • I crocheted a flat disk (sc), using the usual increased (6, 12, 18, etc) until it was 36st around, then did a round of slst (blo), doing an extra ch in each of the six corners.
  • I then embroidered the rainbow on, using chain stitch and some running stich, and I used the yellow to sc around the outside.
  • I then sewed a piece of felt onto the back, and sewed on a brooch pin.
  • To flatten it, I boiled the jug, held the badge in the steam (being careful not to burn myself!) and then pressed it flat.
Here's the back, all nice a neat with a bit of felt covering all the mess! I really enjoyed doing some handsewing again.


To give it to her, I am planning on putting it in this little bag. I think she'll love it! I hope so!!


And now to the Rememberence Day part of the post...

Several men from my family have been in the army, including my father in Vietnam, my maternal grandfather in WWII (I think - he was stationed in Darwin), and my great uncles in WW1, one of whom died. The other was literally saved by the Bible in his breast pocket, which prevented shrapnel from wounding him. 

I have seen the damage war does, even decades later, to those who give their time in service. I love my father, and I recognise that his service in Vietnam took it's toll emotionally, physically and mentally. It's is all due to God that my father and our family is as whole and healed as we are. I count myself blessed when I see how other veterans and their families are still suffering in a very real way.

I honour these men, and I pray that my brothers, my husband, and my future children will not to bear the burden they did. 

Monday, September 12, 2011

Crochet Slippers - Free Crochet Pattern!


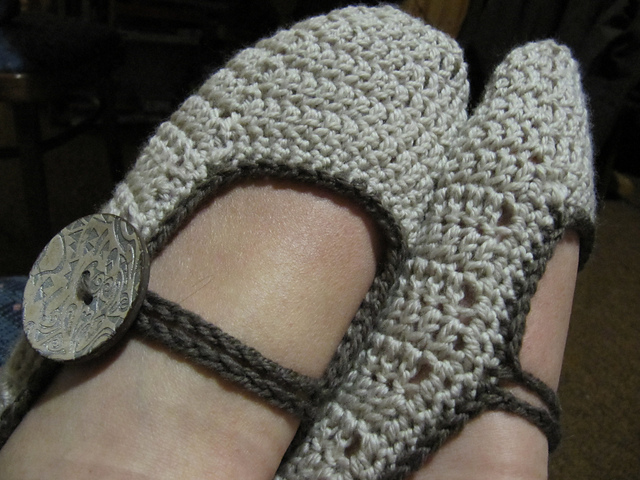
A very long time ago, nearly two years ago to be exact, I made myself some slippers following this very excellent pattern.


Since then, however, I've tweaked and changed the pattern and made it my own. I've made well over half a dozen pairs of slippers using it, and I've finally gotten around to posting it on here so everyone can use it (also so I can link up my projects on Ravelry!).


Because I like to use 8 ply (DK weight) yarn, and it's what I have a lot of, this pattern is made with that in mind. The original pattern (see link at the top of the post) is written for 10 ply, if that's more your thing.

These slippers are quick and easy to make, I can make a pair in just a few hours!


Summer Slippers
(Ravelry Link) 
  • DK weight (8 ply) yarn in two colours (approximately 120m for main colour and 6m for edging colour)
  • 5mm crochet hook
    Tapestry needle for finishing and sewing in the ends
  • Two Buttons 
Notes:
  • Pattern uses US terminology. 
  • Stitches used: chain (ch), slip stitch (slst), single crochet (sc), double crochet (dc), stitch (st). 
  • Magic Ring (also called Magic Loop) -- magic loop video (here are some written instructions)  
  • dc4tog: yarn over the hook, insert hook into stitch, yarn over, pull up loop (3 loops on hook), yarn over, pull yarn through the first two loops on the hook (2 loops on hook). Leave these two loops on the hook, and repeat the process another three times - you will have a total of FIVE loops on your hook. Yarn over the hook, and draw it through ALL FIVE loops, so that you only have one loop on your hook. (If you need more help with this, go here: How to decrease double crochet)
  • sc2tog: insert hook into stitch, yarn over the hook, pull up loop (2 loops on hook), insert hook into next stitch, yarn over hook, pull up a loop (3 loops on hook), yarn over the hook and draw yarn through all three loops (one loop on hook)
  • sc3tog: as for sc2tog, but worked into three stitches instead of two, so you'll end up with a total of 4 loops on your hook before you put the yarn over the hook and draw it through all four loops.

INSTRUCTIONS

This first part is worked in rounds. Don't turn your work!
TOES:
Using your main colour, make a magic ring (see "Notes"), ch 2.
Round 1: 12 dc in magic ring, join with a slst. Pull the magic ring closed. (12dc)
Round 2: ch2, *dc in first st, 2dc in next st, repeat from* (2dc in every second stitch), join with a slst (18dc) 
Round 3: ch2, *dc in each first st and next st, 2dc in next st, repeat from* (2dc in every third stitch), join with a slst (24dc) 
Round 4: ch2, *dc in each first st and next two stitches, 2dc in next st, repeat from* (2dc in every fourth stitch), join with a slst (30dc)
Round 5: ch2, *dc in each first st and next three stitches, 2dc in next st, repeat from* (2dc in every fifth stitch), join with a slst (36dc)
Rounds 6 and 7: ch2, dc in first stitch and every other stitch, join with a slst (36dc) 

Now, you stop working in rounds and begin to work back and forth in rows. 

FOOT:
Row 1: ch 2, dc in first st and the next 23 st, turn (24dc)
Rows 2-13: ch2, dc in each st across, turn (24dc) (Adjust as necessary to fit your foot, my feet are size 7 and a half. For size 6 feet I do two less rows.)
Row 14: ch2, dc in each of next 10 st, dc4tog (see "Notes"), dc in next 10 st (21dc)


Okay, now this bit may be a little tricky, if you don't understand it at first, read it again, and if you still don't quite get it, don't be afraid to give it a go - crochet is easily undone! Essentially, we are making a seam to close up the back of the slipper. 

Chain 1, and make a sc in the first stitch and the next nine (9) stitches (total of 10 sc), and make a slst in the next stitch. Now, fold the right sides together and  slip stitching though the top of the dc and sc, repeat 9 more times (if you did a different number of dc rows, the sc may be at the front). The seam will be on the INSIDE of the slipper once you turn it right side out again.

We're up to the edging (part one)! And we're working in rounds again.

EDGING (Part One):
Round 1: ch1, 2sc in the side of each dc (see picture below), and in the top of each dc from the toes section, including the ones which were worked into when the foot section was started. (It should be about 70sc, but don't panic if it's not. So long as it's even it's fine.) At the end of the round, join with a slip stitch.

(This bit is confusing to explain too - hold tight! Basically, you make 4 seperate sc3tog at different (symmetrical) points around the round to tighten the slipper a little, keep that in mind and you should be fine.)  

Round 2: ch 1, sc in first stitch and next stitch, sc3tog (see "Notes"), then sc in each st until the second last sc before the one done in the dc what was worked into when the foot section was started on the previous round (did that make sense? See round 1 to clarify.) and make another sc3tog to tighten the corner. Work across the toes, making a sc in each st, finishing one stitch short again, and making another sc3tog. Work up the side of the slipper, making a sc in each st, stopping 5 sc short of the end of the row. Make another sc3tog, and then sc to end of round, joining with a slip stitch, cut the yarn and draw through the stitch.

The Edging (Part 2):
We're nearly there! Make sure you read ALL of the next step before starting. Also, for the second slipper, remember that the chain loop needs to be made on the FIRST side you sc down, not the second (as instructed below), otherwise one of your slippers will have the button on the wrong side!

Join the yarn you are using for the edging by inserting your hook in a stitch, drawing up a loop and making a chain. 
Single crochet in each stitch, making a sc2tog (see "Notes") in each of the front two corners. Approximately a third of the way up the second side (about 8 or 9 sc), make a chain loop by chaining 24, then make another sc in the SAME stitch. Sc to the end of the round, join with a slip stitch. (Remember, for the second slipper, make the chain loop while working down the first side.)

Finishing: 
Cut a tail of about 30cm, and draw it up through the last slst. Thread the tail onto the tapestry needle, insert under the very first slst (from Round 1), and back into the centre of the last slst. This makes an invisible join and is very neat. Weave the tail under the stitches of the same colour down the OPPOSITE side of the chain loop until it is even with the loop (hold the sides of the slippers together to determine this), and use the yarn to sew on the button.


Weave in all the end, put them on your feet and take a photo!


I hope you enjoy making some slippers for yourself - if anything is unclear, don't hesitate to contact me, either by email or through Ravelry. Likewise, if you see any mistakes or can think of a better way to explain something, send me a line!

Happy slipper making!


The copyright of this pattern remains with myself. It is provided free for personal use only. The pattern may not be reproduced for commercial purposes. If you want to sell products you have made from this pattern, you are free to do so (please refer to my FAQ page).

Creative Commons License
Summer Slippers by Katherine Crombie is licensed under a Creative Commons Attribution-ShareAlike 3.0 Unported License.

Wednesday, September 7, 2011

Purrrrrrrrple

You might remember that I started making a purple jumper, but undid it all.

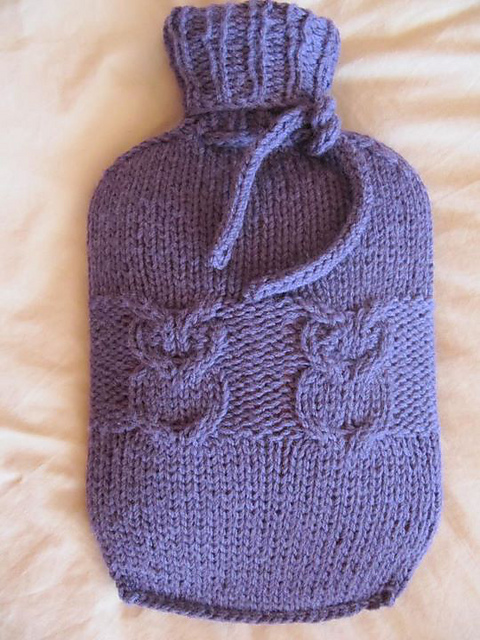
With the rescued yarn, I've made two things, an awesome hot water bottle cover and the thickest, squishiest shawl ever! Sorry for all the colour changes between the photos, purple is really hard to photograph!


I call this my "Hoot Water Bottle Cover" - I think the owls are adorable! And the i-cord was so much quicker to make than I thought it would be. Here is the Ravelry link to my project.

And here is the Oscilloscope Shawl I made (Ravelry link). This is seriously the thickest shawl I've ever seen. I use it as a blanket sometimes. It's luuuuuuuuush.


This picture captures the colour the best.
And while we're on the topic of purple, I crocheted this eggplant a few days ago too:


Cute, don't you think? :D

Tuesday, August 2, 2011

Hello! (And some knitting and crochet)

Well it's been a while since I've shared any knitting and crochet, so I thought I might share a couple of finished projects now - silly faces and all.

I made this cotton doily/placemat thing, which lives underneath the fruit bowl. It's quite pretty. I like it. If the pattern wasn't so boring I would probably make more.


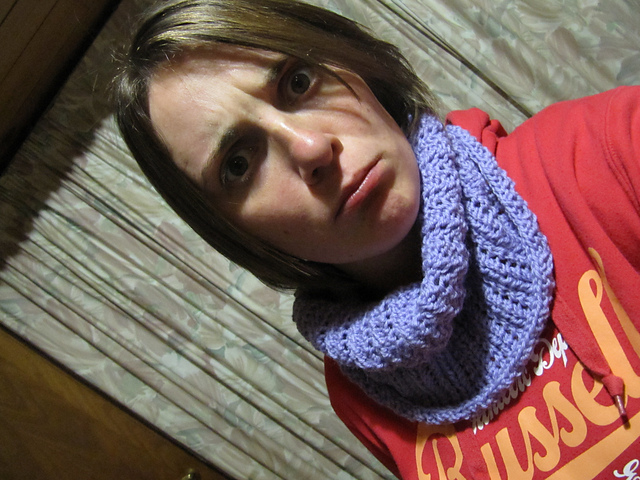
I made a Northumbria Cowl  (using Bendigo Woollen Mills "Luxury" in lavender) for a friend who has given me all her double pointed needles and who sometimes gives me knitting magazines too:


It doesn't really go with my hoodie. (By the way, my hoodie is nearly fluro in colour, but I wear it so much I don't really think of it as bright anymore. I am wearing it right now and I adooooooooooore the colour.) The cowl was nice and quick to knit, and would be good for all you knitters who haven't tried lace yet - just a simple two row repeat (and one row is all knit stitch!) Here's another silly picture of me, in which I remind myself of a duck:
And some tragic news... Remember my purple oatmeal? Well, it no longer exists. I decided it was a bit too small and undid it all. Even though I was undoing several hours work, I have to admit that there is something almost fun about completely frogging (undoing) a large piece of knitting. Most of the wool has already been used for something else, but the pictures I have of it are far to ugly to share (if you must see, go here). Soon I will take some pretty pictures and do a proper reveal!

By the way, I am sick, hopefully I don't look back on this post in a few days time and regret sharing these pictures with the whole world. Well, the part of the world with internet, at least. Most people in Africa, PNG and the Australian Desert (to name a few places) shall continue to think well of me! Not that they know me... oh my, I've really just got to stop typing... Until next time, farewell!

Saturday, May 21, 2011

Finally Knitting Again!

It has been weeks and weeks since I last did any knitting or crochet, but last night the drought was broken!

I finished off the body of my Purple Oatmeal at long last, and am now up to knitting the arms. 


If I had kept working on this at the pace at which most of the body was done, this would have been finished by the end of March, but multiple assignments due in one week kind of distracted me...

I'm sort of putting off starting the sleeves and their miles of stockingstitch. However, as I should be planning for teaching this week I think that's more than acceptable!

I've also done some more work on a neck wrap I'm crocheting, but have no good pictures at the moment - hopefully I'll be able to share it with you soon - as well as some fingerless mittens I'm knitting for a friend.

And I need to make a swift out of lego so I can finish off a lacey scarf I'm crocheting from Mmmalabrigo Lace. Hopefully I'll have lots more to share soon! (ie. in a month or five... oh dear... time just goes by too fast!)

Thursday, April 7, 2011

One Hundred FOs! Yay!

One of my 101 in 1001 goals is to have two hundred projects on Ravelry. Though I didn't specify it on my 101 list, these are to be finished projects (FOs = Finished Objects). In order to help myself achieve this goal, I'm aiming to have 150 finished projects by the end of 2011. 

I'm superduper excited to let you all know that as of April 5, 2011, I'm two thirds of the way there! Yep - I have completed 100 different projects! And that's with counting all those blue flowers as one project, too.

To celebrate this wonderful and exciting (but relatively unimportant in the Grand Scheme of things) moment, here's a little journey through a few projects. Pretty pictures! Yay!

Exhibit A: Fan Bookmark (ravel it here - it's a free pattern!)

I have made this bookmark six (yes, SIX) different times, but I've only kept one. I love it. I feel proud of myself when I finish it (and it only takes an evening to make!). It uses embroidery thread and a tiny 1.25mm crochet hook. It's beautiful whether it's made in a varigated thread (as here) or a solid colour. The best bit, however, is taking photos - I spend an inordinate amount of time choosing the book with which to photograph these bookmarks. So far, my selections have included Little Women, The Secret Garden, one of the Anne books (Rainbow Valley, I think), and (boringly) the pattern for making the bookmarks.

Exhibit B: Chevron Cardigan (another freebie - ravel it)


This progress shot is of the third thing I ever crocheted and of the first garment I made myself. (Excluding a pair of trousers I sewed in grade 10, and ruined by melting them with the iron - I swore and mum didn't even tell me off because she realised what had happened. I love my mum.) I have actually worn it, too! Though I don't wear it much very more, and have thought about frogging (undoing) it to make it into something else. I like this picture (though I can't articulate why) and so that's why I'm sharing it instead of one from when it was finished.

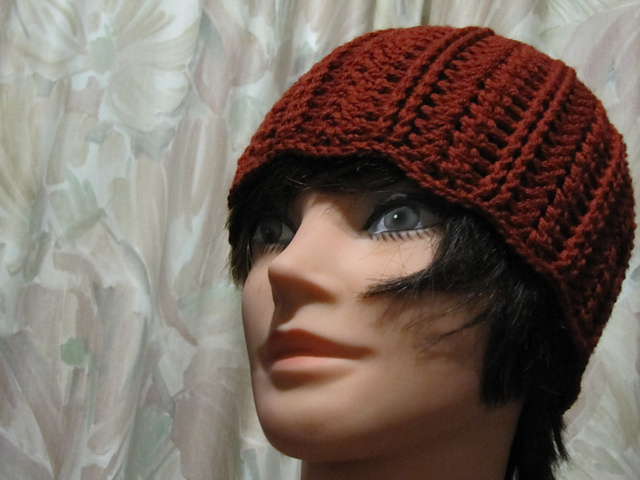
Exhibits 3, 4, 5 and 6: My very own patterns! 
(Ravel them all here or visit the Crochet Patterns page on this blog - they are all free)


Please note that the large orange flower is not of my design.

I really am so proud of each of the patterns I've written, and stoked by the response to the scarf and beanie patterns. It's such a joy to know that others have not only made something that I thought of and wrote a pattern for, but that they also love the result of their time and effort. I have plans for another pattern to release soon, depending on a few things... but to see a prototype simply keep reading...

Exhibit 7: Slippers! (pattern may be coming soon, for shorthand notes on it, go here).


These are inspired by (and reasonably similar to) this free slipper pattern (ravelry link), but are designed with an 8ply yarn in mind (as opposed to a heavier 10ply), and have a different increase pattern for the toes. and a slightly different edging. I have made several pairs of these slippers, and am planning on making many more. They are comfy, don't use much yarn, and are really cute. Love 'em! I also sell them to friends for twenty bucks a pair :)

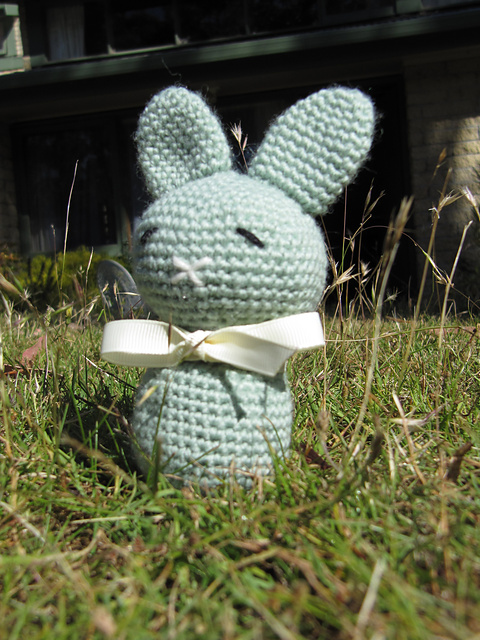
Exhibit 8: Love Bunnies (free pattern, ravel it here)


I have made four of these cute as a button bunnies: pink, purple, blue and green. The blue and green bunnies had bells inserted into their heads (instead of brains) so that they would be a bit like a rattle. I've included this as an exhibit because it was the first item I ever sold (for the token amount of $10 - just enough to cover cost). I felt very grown up!

So, that was a quick trip through a few projects! I love looking through the pictures of what I've made. Some things I would forget about if not for the photos I have because they've either been sold or given away as presents. I've also completed a number of knitted projects, even though there weren't any shown here. I think I'm well on my way to my goal of 150 FOs by the end of thisyear, and 200 FOs by July 2013. Yay!