Showing posts with label tutorials. Show all posts

Saturday, November 9, 2013

Cord Edged Coasters: Free Crochet Pattern!

It seems to me that half the people I know are really tired right now, and I am right there, yawning along with them.

On Thursday, in my half asleep haze, I watched a couple of old movies (Babe, Pollyanna) while my fingers hooked up an incredible EIGHT coasters.


I then used Snapchat to turn them into pictures to send to my friends: 


I thought I would share the incredibly simple pattern with you.

I used a ball of 8ply (DK) that I scored from a secondhand shop years ago for $2, and then dyed. Out of the 99.7m (109yards) I just managed to eke out eight coasters.

Here are five: 

Cord Edged Coasters

This pattern uses US terms!
UK/AUS terms are in italics, eg: (triple crochet!

Yarn: I used DK weight yarn

Hook: I used a 4mm (G) hook


Start: Make a loop to crochet into, you could do a magic loop if you want to. Because I wanted to get the most out of my yarn, I made a slip stitch (leaving a very short tail), chained 4, then slip stitched into the first stitch to close it.

Round 1: chain 2, make twelve double crochets (triple crochet) into the ring, slip stitch into top of first double crochet (triple crochetto join.

Round 2: chain 2, make two double crochets (triple crochet) in the same stitch, and in each stitch thereafter. Slip stitch into the top of the first double crochet (triple crochet) to join. (24 stitches in total)

Round 3: chain 2, make one double crochet (triple crochet) in the same stitch, and two double crochets (triple crochet) in the next stitch. Repeat this pattern of one double crochet (triple crochetand then two double crochets (triple crochet) (1, 2) all the way around. Slip stitch into the top of the first double crochet (triple crochet) to join.  (36 stitches in total)

In the next round, instead of doing double crochet (triple crochet), we make single crochet (double crochet). 

Round 4: Chain 2, make one single crochet (double crochet) in the same stitch, a single crochet (double crochet) into the next stitch, and two single crochets (double crochet) in the stitch after that. Repeat this pattern (1, 1, 2) all the way around. Slip stitch into the top of the first single crochet  (double crochet) to join.  (48 stitches in total)

Now, the bit that feels really weird! We are going to do reverse single crochet (also called crab stitch) to make the edging. This just backwards crochet. I am left handed, so usually I crochet in a clockwise direction. For reverse single crochet, however, I crochet in an anti-clockwise direction. 

There are lots of video tutorials already on the web. I have embedded one at the end of this post.

Edging: chain 1, skip the closest stitch, and reverse single crochet all the way around for that lovely cord-like edging. Finish it off by cutting a tail of about 10cm (4inches), threading it only a needle, and making a couple of stitches that mimic the previous crab stitch. Weave in ends.

Now make yourself a drink and use the coaster!

This pattern is for personal use only. The pattern may not be distributed or sold. Items made from this pattern, however, are yours to do what you wish with, including selling.


http://www.mooglyblog.com/reverse-single-crochet-crab-stitch/

Monday, April 4, 2011

Making the Saroyan

(Crocheters, there's a little note at the end especially for you!)

I've had a few people comment on the saroyan I made for my sister, asking if it would be too hard for an inexperienced knitter, or saying that they "could never make that".

In response, I want to encourage all of you who knit, love the scarf, but are hesitant to have a go at it. It was my first lace project. If you can knit and purl, you have the prerequisites to make this scarf. The leaves that edge the scarf are made using combinations of decreases (such as knitting 2 stitches together: k2tog) and increases (like yarn overs [yo] and knitting into the front and the back of the stitch [kfb] which may be difficult if you knit very tightly, but other than that is simple).

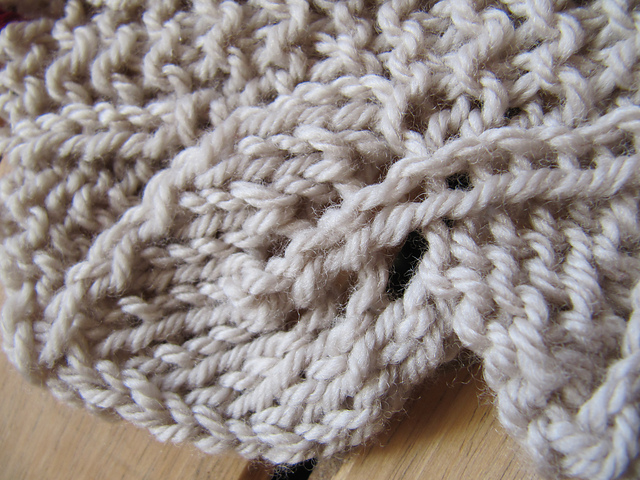
If you look at the picture below, you can see that the majority of each row is plain stockingette: knitting and purling. Very easy! The leaf portion of each row is very small.


Looking at an individual leaf (see the picture below), you can see that a portion of each leaf contains a significant amount of stockingette stitch, just like the body of the scarf. The holes are made using yarn overs (yo) which really are very easy: simply wrap the yarn anticlockwise from bottom to top around the needle in your right hand (for right handed knitters, of course, the other needle if you're left handed). The leaf also uses one or two other increases, which are all demonstrated here at Knitting Help.
The leaf also utilises decreases to form its shape, these can all be seen here, also at Knitting Help. Knitting Help really does live up to it's name: you will also find videos on how to cast off, which you need to know, as when a leaf is completed, six stitches are cast off, making the leaves stand out more. This is simple, and not something of which to be nervous.

As with many projects, the first bit is the hardest, but by no means is it impossible. If you visit my project page on ravelry for the saroyan, you can see the changes I made. You can also see that it only took me a month to make (as I restarted it on the 23rd of November after deciding that I wanted to begin it differently to how the pattern is written). You will also be able to finish this in a month, just by doing one repeat (that is, a new leaf) every day. If you visit the ravely pattern page for the saroyan, you will get more information, and you will also be able to look at the saroyans made by other people, finding information and tips.

Lastly, let me encourage you by saying this: if you don't try to learn new techniques (such as knitting lace) your knitting skills will stagnate and you will will never know what you are capable of doing and making.

For the crocheters out there who like this design but never want to knit, Camille is a crochet version of the Saroyan, and really is very pretty - I plan to make it one day. I imagine that it would be gorgeous made out of a merino and silk blend: warm yet drapy.


Tuesday, December 14, 2010

Advent Day 14 (But really only day 3)

Well, I have done an awful job posting everyday leading up until Christmas. I'm sure I'm no busier than most other people, yet somehow they find time to post!

Christmas knitting is still happening (extremely slowly - I need to speed up if I'm going to finish in time!), some presents have been bought, and the house has been decorated. No photos to share, however, as since then a hurricane has adversely affected the state of my house :(

I've come across a couple of sweet Christmassy idea, which I've been wanting to share with you, my lovely and deeeply appreciated readers :D

Kootoyoo shared a tutorial for these cute no-sew flower ornaments:


I think this felt ornament is simply adorable, and the tutorial is free over on zakka life. Yay! I might even have time to make some... for next Christmas...

Image belongs to zakka life
And lastly, something to munch on. My friend directed me to this cake recipe: Boiled Chocolate Cake. Apparently it doesn't look like much, but the taste and the moistness are incredible. As soon as the damage from the hurricane is taken care of I plan on making it.

Hope all your Christmas planning is going well!


P.S. Don't worry, there wasn't really a hurricane... my house is just superduper messy.