Thursday, November 3, 2011

Day 3: The Tupperware Cabinet

I should start this post by letting you know that I don't have a tupperware cabinet.
I have a plastic tub that I keep all my plastic (tupperware and otherwise) containers in. 

I have a small kitchen!

This is where the containers live, in the tub directly under the microwave under the stairs:

See the neft guns? And the ladybugs? And yes, we use margarine (shock horror!).
This is before I started going through my "tupperware tub":


These are the things I decided not to keep:

The things on the left were put into recycling, I'm using the drinkbottle and I want to declutter the tupperware.
Finally, this was after:

As you can see, there's still plenty of tupperware left.
It's not much different, but it is neater and it's enough to make me happy, and isn't that what organising your home is really all about?

Btw, would any of you like these tupperware "FlatOut" containers? A set of four, barely used. 

This is what they look like "popped out" - 950ml capacity.
Flattened out, they really don't take up much space.
Leave a comment and I'll get back to you (make sure you include your email address). 


Tuesday, November 1, 2011

Day 2: Computer Desk

The computer desk is my husband's domain. I use the diningroom table as a computer/yarn and knitting/uni work station. 
My husband, while not filthy or disorganised, is not immune to leaving things like steak knives on the computer desk for weeks at a time.

This is the computer desk before I started on my cleaning and organising:


And again, from another angle:

Cous cous and coffee, anyone?

Yes, we really do have a computer with no sides... it was overheating. I think it looks pretty awesome like this.

After taking these photos, I procrastinated for about half and hour, before starting on a general tidy up of the floor and desk top. This led me to cleaning up the two top drawers a little, and the middle drawer now contains computer related cords which are bound up neatly with metal ties (the ones that come with freezer bags). I'm really quite pleased with it! 

Other things were relocated upstairs, some things even went into the junk drawer. Once tidy, I dusted. And dusted and scrubbed and dusted... for ages!!! 

Finally though, this was the result:

The thing with the heart on it gets put in front of the external hard drive so the flashing light doesn't annoy me.

And again:

Julian used to have awesome headphones too, but they broke. New ones for Christmas, perhaps?

I ignored the "media centre" right next to it, on which some things from the computer desk were dumped:


That's a job for another day!

Day 1: Junk Drawer

I sorted through my junk drawer not to long ago, so there isn't that much difference between the before and after pictures, but some things were thrown out and others were relocated, so all in all it was an organising success!

Welcome to my junk drawer:
Before:


As you can see, it's quite respectable for a junk drawer. This is partly because all the batteries, lightbulbs and glues have a drawer of their own. The blue bag is full of pens and pencils. The thing in the top right corner is an old fashioned camera.

The scariest part is the white container:


As you can see, this is full of a whole lot of random things, from sunnies to goggles to a handbag strap. The teeth were a present for my husband from my mum and dad. They chatter and chomp and are really quite entertaining.

In the white container were these little treasures, all belonging to my husband:


Clockwise from the top left: Manchester United keyring, brought back as a souvenir from the UK by his (that is, my husband's) sister; my husband's Bronze Medallion for swimming, earnt in grade nine; the glasses that my husband wore in primary school to help him concentrate; an Australian 2 cent coin given to my husband from his nan, featuring a frilled neck lizard.

Needless to say, these did not get thrown out, unlike half of the padlocks in the picture below.


Here are all the things that were thrown out (the game was from another drawer, and the Slazenger bag is empty):


As you can see, I didn't get rid of that much. Below is a picture of the things which were relocated, mostly to the computer desk, though the corner cutter thing will go in the box with the card making supplies, and the sunnies will go in the basket near the front door.


And this brings us to the finished result. There aren't too many differences, but it is just that bit more organised, which makes me happy! The main difference is that now all the screws, allen keys, and other things of that nature are all in a bag together. Also, the 3D glasses for the cinema are now kept in this drawer too.

After:


I find it amusing that this drawer looks MORE cluttered since organising it! But this is partly because other drawers were organised at the same time, and things were moved around to make the best use of the space I have to work with.

Since taking this, a couple of other things have also been put in here, as a result of cleaning and organising the computer desk, which I'll talk about in my next post.

Monday, October 31, 2011

21 Day Organising Challenge

Brought to you by A Bowl Full of Lemons, this challenge came to my attention because of my friend and her bloggie woggie.


Basically, over 21 days, your tidy and organise 21 mess "hot spots". I've only done the first two days so if you are also tired of not knowing where your Nintendo DS is, or of all your towels falling out of the cupboard when you open it, please feel free to join in!


21 DAY ORGANIZING CHALLENGE

  • Join the Challenge (at any time)
  • Day 1 - Junk Drawer
  • Day 2 - Computer Desk
  • Day 3 - Tupperware Cabinet
  • Day 4 - Linen Closet
  • Day 5 - Under kitchen sink
  • Day 6 - Dresser Drawers
  • Day 7 - The Pantry
  • Day 8 - Coat Closet
  • Day 9 - Toy organization
  • Day 10 - Laundry Room
  • Day 11 - The Freezer
  • Day 12 - Spice Cabinet
  • Day 13 - Medicine Cabinet
  • Day 14 - Under bathroom sink
  • Day 15 - Medicine/Vitamin Storage
  • Day 16 - The Fridge
  • Day 17 - The Mail
  • Day 18 - Keepsakes
  • Day 19 - Master Closet
  • Day 20 - Photos
  • Day 21 - You pick!


Go here for more info and to see some inspiring before and after photos!


Saturday, October 29, 2011

It's FINISHED! (plus two snails)

Well hello!

It's gotten back to me that certain people (Beka) are mourning by blogging absence, even though we see each other a lot. As in, the only other person I see more is my husband (who is totally freaked out about how similar we are haha). 

I admit that I have been putting off writing a post, because I feel like there are so many other things I want to say, so this is going to be a sort of summary post. You will, however, have to visit my other *ahem* healthy living blog to see me with a giant box of chocolates.

Okay, let me get you up to speed, from least to most important:

1. I took lots of photos of a cute snail which I was going to blog about, but didn't. Here's one of them:


2. I've added a "Follow me on Pinterest" button on the sidebar. If you're on Pinterest and you like the sort of things I pin, start following me, and I'll follow you in return! I am just a little bit addicted...

3. I've decided not to take part in NaNoWriMo this year. I already have enough going on without trying to write 50,000 words in one month. My author-friend Lissa, however, is taking part, and will be sharing her progress throughout the month (she also has some of her stories available FREE until the end of October!).

4. I've begun a 21 Day Organisation Challenge (thanks to Beka, who's also doing it). I'll post more about it in the next couple of days. If you want to join in feel free; I'm only up to day two.

5. This is the MOST important update of all...

I've finished my degree!!!*^

*so long as I've passed everything!
^if I passed, I'm qualified to teach anywhere in the world!

As you can probably guess, I am over the moon about this! I started going to uni SEVEN years ago with the intention of becoming a primary school teacher, and now here I am on the other side! If you are newer here, you can read about some of the struggles of this journey here.


Incidentally, here's another snail, made in class while completing my Master of Teacher course:

more pics
And there you are, all up to date!


I'll be back soon with a post about the 21 Days Organising Challenge (warning: there will very likely be lots of pictures).


Wednesday, September 14, 2011

I Dream of Vertical Driveways

As some of you know (and will have read), I occasionally have pretty full on dreams, often featuring my friends. 

So, here's a bit of a dream journal, about my dream last night... enjoy! (It's a bit long, but it reads fast!)


I Dream of Vertical Driveways (and rowing boats)

(Note: our family used to have a beautiful Huon Pine and Celery Top dinghy (now a family friend owns it, and Dad loves boats. Also note that I knit a lot, and that the place names are real, Google them if you so desire!)


It's stormy, windy and also sunny - only in Tasmania. Dad is teaching my brothers how to sail a rather small wooden tall ship into the harbour at Hobart while my husband and I look on.

They make it into the harbour, and then the scenario begins to repeat itself. It has become more dangerous, and there are rocks, smooth and sloping gently and decidedly into the rough water. The boys sail the ship dangerously close...

They make it, and the scenario repeats itself again. This time the boys sail the ship too close to the rocks, which are darker and angrier than before. I hear the squealing sound and see the edge of the ship scraping along the rock face. I scream out, "Dad! Dad! It's on the rock! It's too close!" 

My father hears me, and a frenzy of movement on board ensues as the ship is eased off the rock. Again, it arrives safely in the harbour. I realise that my husband and I are now in the harbour too, in a small wooden dinghy which I recognise. Of course, it's my father's boat.

source
Dad is busy, organising things on the ship, getting it ready to dock. I call out to him, "Dad, we'll row the dinghy back! Where does it need to go?" He is smiling as he calls out the answer, "To Geeveston - it's a long trip!" "We'll be okay! We'll meet you there so you can drive us home."

In my dream I realise that although my dad said Geeveston, I'm picturing Franklin. (Now I'm realising that in my dream I was picturing Huonville and Franklin as just down the coast, a bit past Kingston and Blackman's Bay, when in actuality it's much further).

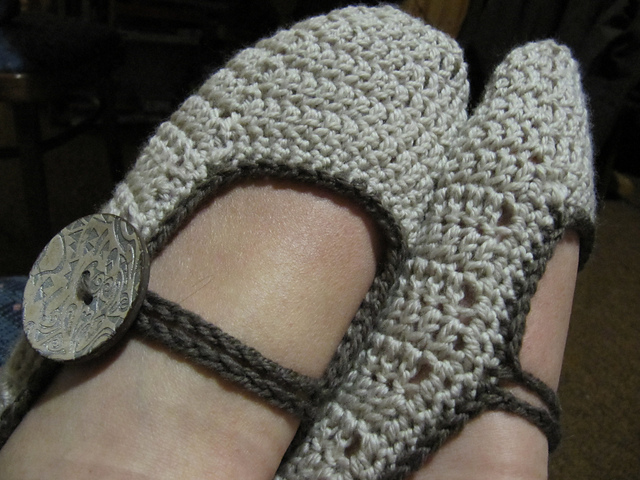
My husband and I start to row, and I am careful to have good form so I don't strain my back. Soon we reach Franklin, and, realising that it's not Geeveston, we decided to stop for a break and buy some scones with jam and cream. In my dreams, Franklin is much bigger than it is in real life, and I decide to pick up some knitting I'd left at a friends place. I recognise the place and the person, not from real life, but from another dream. Her antisocial and mentally ill husband stays hidden in another room while we are there. We don't stay long.

After we leave her place, we decide we are too tired to continue rowing, and start looking for a place to store the boat so it won't get stolen. My husband is skeptical, "the people who we leave it with will most likely steal it" but I brush his fears aside. We come to a place on the edge of town, and are walking up the driveway when we are confronted by an angry, defeated woman sitting on her house's doorstep. 

"You should go before he sees you!"
"Who?" I reply, curious, but she doesn't have time to answer before we hear a man raging at us.
"How dare you step on my property! You'll pay for this!"

I look up to see that this house is one of several similar ones which spread over the side of a steep hillside. The one I'm standing at is at the base of the hillside. The one from which the yelling man has emerged is located half way up the hillside, at the top of an extremely steep driveway.

source
"We were looking for someone to look after our boat for us." 
"Really! Just come up here and try to explain it!" His tone is threatening, but I decide to do as he said.

I start to climb the driveway. I have to hold onto the edges to stop myself from falling. Soon it's vertical, and I'm trying to pull myself up using just my arms. About half way up I realise that the man has gone inside. Just as I realise this, he emerges from his house, shotgun in hand. Without thinking, I allow myself to slide back down the driveway, listening with fright his threatening bellows and the sounds of the shotgun being loaded and cocked.

I run for the car (which wasn't there before), and realise with amusement and terror that it's exactly the same as his car, which is perched at the top of his driveway. I have the advantage though, as the keys are already in the car... but this advantage is lost when the car suddenly faces the wrong way, requiring a three-point turn. In a frenzy I leap in the car only to fall out the other side, but at least I managed to start the engine! I dash around the car again and leap in as another me moves over to the passenger seat. I hear the roar of the crazy man's car starting and think with horror of the speed the car will gain as it goes down that driveway.

Our car is now ripping out of the driveway, but instead of driving, I'm in the backseat and feeling vulnerable, scared that the mad man will shoot at the car and shatter the back windscreen. My husband is in the front passenger seat, and someone else is driving at a speed people usually only reach on video games. Putting on the brakes to corner the speed is still insanely fast, it makes me feel light headed. I look back, and the other car is nowhere in sight - perhaps we left too quickly? Perhaps the man was more about bluff than we thought?

Determined to put as much distance between us and him as possible, we continue to speed, other cars are blurs, and it's a miracle we don't crash. Finally, as we begin to realise we are safe, the speed of the car slows, and we're back at the water's edge, safe and happy to sit under a weeping willow and simply breathe. 

source
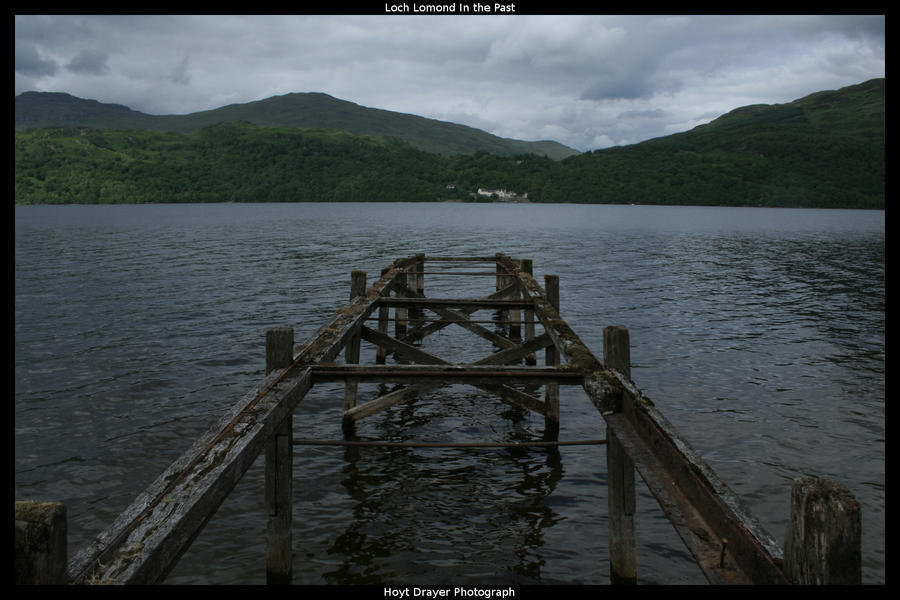
The dinghy floats demurely, occasionally bumping against the jetty, and we wait. Soon dad will be here and we'll load the dinghy onto the boat trailer and head home.

Monday, September 12, 2011

Crochet Slippers - Free Crochet Pattern!


A very long time ago, nearly two years ago to be exact, I made myself some slippers following this very excellent pattern.


Since then, however, I've tweaked and changed the pattern and made it my own. I've made well over half a dozen pairs of slippers using it, and I've finally gotten around to posting it on here so everyone can use it (also so I can link up my projects on Ravelry!).


Because I like to use 8 ply (DK weight) yarn, and it's what I have a lot of, this pattern is made with that in mind. The original pattern (see link at the top of the post) is written for 10 ply, if that's more your thing.

These slippers are quick and easy to make, I can make a pair in just a few hours!


Summer Slippers
(Ravelry Link) 
  • DK weight (8 ply) yarn in two colours (approximately 120m for main colour and 6m for edging colour)
  • 5mm crochet hook
    Tapestry needle for finishing and sewing in the ends
  • Two Buttons 
Notes:
  • Pattern uses US terminology. 
  • Stitches used: chain (ch), slip stitch (slst), single crochet (sc), double crochet (dc), stitch (st). 
  • Magic Ring (also called Magic Loop) -- magic loop video (here are some written instructions)  
  • dc4tog: yarn over the hook, insert hook into stitch, yarn over, pull up loop (3 loops on hook), yarn over, pull yarn through the first two loops on the hook (2 loops on hook). Leave these two loops on the hook, and repeat the process another three times - you will have a total of FIVE loops on your hook. Yarn over the hook, and draw it through ALL FIVE loops, so that you only have one loop on your hook. (If you need more help with this, go here: How to decrease double crochet)
  • sc2tog: insert hook into stitch, yarn over the hook, pull up loop (2 loops on hook), insert hook into next stitch, yarn over hook, pull up a loop (3 loops on hook), yarn over the hook and draw yarn through all three loops (one loop on hook)
  • sc3tog: as for sc2tog, but worked into three stitches instead of two, so you'll end up with a total of 4 loops on your hook before you put the yarn over the hook and draw it through all four loops.

INSTRUCTIONS

This first part is worked in rounds. Don't turn your work!
TOES:
Using your main colour, make a magic ring (see "Notes"), ch 2.
Round 1: 12 dc in magic ring, join with a slst. Pull the magic ring closed. (12dc)
Round 2: ch2, *dc in first st, 2dc in next st, repeat from* (2dc in every second stitch), join with a slst (18dc) 
Round 3: ch2, *dc in each first st and next st, 2dc in next st, repeat from* (2dc in every third stitch), join with a slst (24dc) 
Round 4: ch2, *dc in each first st and next two stitches, 2dc in next st, repeat from* (2dc in every fourth stitch), join with a slst (30dc)
Round 5: ch2, *dc in each first st and next three stitches, 2dc in next st, repeat from* (2dc in every fifth stitch), join with a slst (36dc)
Rounds 6 and 7: ch2, dc in first stitch and every other stitch, join with a slst (36dc) 

Now, you stop working in rounds and begin to work back and forth in rows. 

FOOT:
Row 1: ch 2, dc in first st and the next 23 st, turn (24dc)
Rows 2-13: ch2, dc in each st across, turn (24dc) (Adjust as necessary to fit your foot, my feet are size 7 and a half. For size 6 feet I do two less rows.)
Row 14: ch2, dc in each of next 10 st, dc4tog (see "Notes"), dc in next 10 st (21dc)


Okay, now this bit may be a little tricky, if you don't understand it at first, read it again, and if you still don't quite get it, don't be afraid to give it a go - crochet is easily undone! Essentially, we are making a seam to close up the back of the slipper. 

Chain 1, and make a sc in the first stitch and the next nine (9) stitches (total of 10 sc), and make a slst in the next stitch. Now, fold the right sides together and  slip stitching though the top of the dc and sc, repeat 9 more times (if you did a different number of dc rows, the sc may be at the front). The seam will be on the INSIDE of the slipper once you turn it right side out again.

We're up to the edging (part one)! And we're working in rounds again.

EDGING (Part One):
Round 1: ch1, 2sc in the side of each dc (see picture below), and in the top of each dc from the toes section, including the ones which were worked into when the foot section was started. (It should be about 70sc, but don't panic if it's not. So long as it's even it's fine.) At the end of the round, join with a slip stitch.

(This bit is confusing to explain too - hold tight! Basically, you make 4 seperate sc3tog at different (symmetrical) points around the round to tighten the slipper a little, keep that in mind and you should be fine.)  

Round 2: ch 1, sc in first stitch and next stitch, sc3tog (see "Notes"), then sc in each st until the second last sc before the one done in the dc what was worked into when the foot section was started on the previous round (did that make sense? See round 1 to clarify.) and make another sc3tog to tighten the corner. Work across the toes, making a sc in each st, finishing one stitch short again, and making another sc3tog. Work up the side of the slipper, making a sc in each st, stopping 5 sc short of the end of the row. Make another sc3tog, and then sc to end of round, joining with a slip stitch, cut the yarn and draw through the stitch.

The Edging (Part 2):
We're nearly there! Make sure you read ALL of the next step before starting. Also, for the second slipper, remember that the chain loop needs to be made on the FIRST side you sc down, not the second (as instructed below), otherwise one of your slippers will have the button on the wrong side!

Join the yarn you are using for the edging by inserting your hook in a stitch, drawing up a loop and making a chain. 
Single crochet in each stitch, making a sc2tog (see "Notes") in each of the front two corners. Approximately a third of the way up the second side (about 8 or 9 sc), make a chain loop by chaining 24, then make another sc in the SAME stitch. Sc to the end of the round, join with a slip stitch. (Remember, for the second slipper, make the chain loop while working down the first side.)

Finishing: 
Cut a tail of about 30cm, and draw it up through the last slst. Thread the tail onto the tapestry needle, insert under the very first slst (from Round 1), and back into the centre of the last slst. This makes an invisible join and is very neat. Weave the tail under the stitches of the same colour down the OPPOSITE side of the chain loop until it is even with the loop (hold the sides of the slippers together to determine this), and use the yarn to sew on the button.


Weave in all the end, put them on your feet and take a photo!


I hope you enjoy making some slippers for yourself - if anything is unclear, don't hesitate to contact me, either by email or through Ravelry. Likewise, if you see any mistakes or can think of a better way to explain something, send me a line!

Happy slipper making!


The copyright of this pattern remains with myself. It is provided free for personal use only. The pattern may not be reproduced for commercial purposes. If you want to sell products you have made from this pattern, you are free to do so (please refer to my FAQ page).

Creative Commons License
Summer Slippers by Katherine Crombie is licensed under a Creative Commons Attribution-ShareAlike 3.0 Unported License.

Wednesday, September 7, 2011

Purrrrrrrrple

You might remember that I started making a purple jumper, but undid it all.

With the rescued yarn, I've made two things, an awesome hot water bottle cover and the thickest, squishiest shawl ever! Sorry for all the colour changes between the photos, purple is really hard to photograph!


I call this my "Hoot Water Bottle Cover" - I think the owls are adorable! And the i-cord was so much quicker to make than I thought it would be. Here is the Ravelry link to my project.

And here is the Oscilloscope Shawl I made (Ravelry link). This is seriously the thickest shawl I've ever seen. I use it as a blanket sometimes. It's luuuuuuuuush.


This picture captures the colour the best.
And while we're on the topic of purple, I crocheted this eggplant a few days ago too:


Cute, don't you think? :D